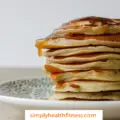
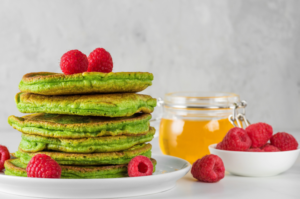
Are you looking for a unique and flavorful twist on traditional pancakes? Look no further than matcha pancakes! These green tea-infused delights are not only delicious but also packed with health benefits.
In this ultimate guide, we’ll walk you through the step-by-step process of creating a mouthwatering matcha pancake recipe that will impress your taste buds and your friends.
Why Choose Matcha Pancakes?
Matcha pancakes offer a delightful combination of sweet, vanilla flavor and the vibrant green color of matcha powder. But what sets them apart from regular pancakes? Here are a few reasons why you should give matcha pancakes a try:
- Unique Flavor: Matcha powder adds a distinct earthy and slightly bitter flavor to the pancakes, giving them a unique taste that you won’t find in traditional pancakes.
- Health Benefits: Matcha is rich in antioxidants, which help protect your body from harmful free radicals. It also contains caffeine and L-theanine, which provide a calm and focused energy boost.
- Nutritional Value: Matcha pancakes are made with wholesome ingredients like rolled oats, spinach, and hemp seeds, making them a nutritious choice for a balanced breakfast or brunch.
- Easy to Make: Despite their fancy appearance, matcha pancakes are surprisingly simple to make. With just a few pantry ingredients and a blender, you’ll have a stack of delicious pancakes in no time.
Now that you know why matcha pancakes are worth a try, let’s dive into the recipe and explore the ingredients and steps to create this delectable dish.
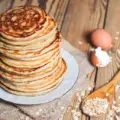
Ingredients for Matcha Pancakes
Before you start making matcha pancakes, gather the following ingredients:
- 1 1/2 cups Rolled oats
- 1 cup Milk
- A handful Spinach
- 2 teaspoons Matcha powder
- 2 tablespoons Hemp seeds
- 1 Egg
- 1 teaspoon Vanilla extract
- 2 tablespoons Maple syrup or honey
- 1/2 teaspoon Baking powder
- A pinch of Salt
- Coconut oil (for greasing) As needed
Step-by-Step Instructions
Now that you have all the ingredients ready, let’s dive into the step-by-step process of making matcha pancakes:
Step 1: Prepare the Ingredients
Start by measuring and preparing all the ingredients. This will make the cooking process smoother and more enjoyable.
Step 2: Blend the Ingredients
In a high-speed blender, add the rolled oats, milk, spinach, matcha powder, hemp seeds, egg, vanilla extract, maple syrup or honey, baking powder, and salt. Blend everything at high speed until you achieve a smooth texture. If you prefer a sweeter taste, you can add additional sweetener to your liking.
Step 3: Let the Batter Rest
Allow the batter to rest for a few minutes. This will give the oats time to soak up some of the moisture, resulting in a denser pancake batter.
Step 4: Heat the Pan and Grease it
While the batter is resting, heat a pancake pan over medium heat. Grease the pan with coconut oil cooking spray or a small amount of coconut oil using a brush.
Step 5: Cook the Pancakes
For each pancake, drop 1/4 cup of batter onto the pan. Cook for 1-2 minutes until the pancake is lightly browned. Carefully flip the pancake using a flexible silicone spatula and cook for another minute. Transfer the cooked pancake to a plate. Repeat this process with the remaining batter, greasing the pan before each pancake.
Step 6: Serve and Enjoy
Once all the pancakes are cooked, it’s time to get creative with your toppings. You can serve the matcha pancakes with yogurt and fresh fruits like blueberries, strawberries, or raspberries. Drizzle them with maple syrup or honey for added sweetness. You can also sprinkle them with bee pollen, chopped nuts, or hemp seeds to enhance the texture and flavor. Let your imagination run wild!
Tips for Serving and Storing Matcha Pancakes
Serving Suggestions
Here are some delicious ways to serve and enjoy your matcha pancakes:
- Top the pancakes with a dollop of yogurt and a handful of fresh berries for a refreshing and nutritious breakfast.
- Spread a layer of nut butter, such as peanut butter or almond butter, on the pancakes and add sliced bananas for a satisfying and filling snack.
- Drizzle the pancakes with maple syrup or honey and sprinkle them with chopped nuts or granola for an indulgent brunch treat.
Storing Instructions
If you have any leftovers or want to make a batch of matcha pancakes ahead of time, here are some tips for storing them:
- Keep the pancakes covered in the refrigerator for up to 4 days. You can reheat them in the microwave or on a stovetop pan.
- To freeze the pancakes, allow them to cool completely and then place each pancake individually in wax paper bags or stack them between wax paper. Store the wrapped pancakes in a large freezer zip-lock bag and keep them in the freezer for up to 3 months. Thaw the pancakes at room temperature when you’re ready to enjoy them.
Substitutions and Variations
If you want to customize your matcha pancakes or have specific dietary restrictions, here are some substitution options:
- Milk: You can use any type of milk you prefer or have on hand, such as almond milk, soy milk, or cow’s milk. However, coconut milk may not work well in this recipe.
- Coconut Oil: If you don’t have coconut oil, you can substitute it with avocado oil or avocado oil cooking spray.
- Hemp Seeds: If you don’t have hemp seeds, you can use flax seeds or chia seeds instead. These alternatives will still provide nutritional benefits and add a delightful crunch to your pancakes.
- Sweetener: If you prefer a different sweetener, you can substitute maple syrup or honey with date syrup or stevia. Just make sure to adjust the amount according to your taste preferences.
- Vegan Option: To make these pancakes vegan, swap the egg for a flax or chia egg and use a non-dairy milk alternative.
- Gluten-Free Option: If you follow a gluten-free diet, use certified gluten-free oats to ensure your pancakes are safe to consume.
Recipe Tips and Tricks
To ensure the best results and elevate your matcha pancake-making skills, here are some tips and tricks to keep in mind:
- When adding ingredients to the blender, always start with the liquids first. This will help the blender run smoothly and prevent lumps in the batter.
- Use a high-power blender to ensure all the ingredients are well blended and the pancake batter is silky smooth.
- Let the batter rest for a few minutes before cooking. This allows the oats to absorb some moisture, resulting in a denser batter and fluffier pancakes.
- If you plan to let the batter sit overnight, be aware that it may become very dense. In that case, you may need to add a bit more liquid to achieve the desired consistency.
- Taste the batter before cooking and adjust the sweetness to your preference. Feel free to add more sweetener if you desire a sweeter pancake.
- If you’re looking for additional sweetener recommendations, honey, stevia, date syrup, or low-carb sweeteners are great alternatives. Choose the one that suits your taste and dietary needs.
- When greasing the pan, use organic virgin coconut oil instead of refined versions for a healthier option.