Are you tired of store-bought milk alternatives that just don’t satisfy your taste buds? Look no further! In this ultimate guide, we will walk you through the step-by-step process of making creamy and delicious cashew coconut milk right in the comfort of your own home.
This dairy-free and vegan-friendly milk is not only packed with flavor, but it’s also incredibly versatile, making it a perfect addition to your morning cereal, smoothies, baked goods, and more. So grab your ingredients and let’s get started!
What is Coconut Cashew Milk?
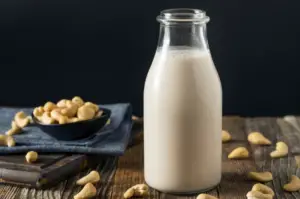
Coconut cashew milk is a delightful blend of shredded coconut and creamy cashews. The combination of these two ingredients creates a rich and velvety texture that will tantalize your taste buds. The best part? It’s completely dairy-free and plant-based, making it a great option for those with lactose intolerance or following a vegan lifestyle.
Ingredients You’ll Need
To make this delicious coconut cashew milk, you’ll need the following ingredients:
- 1 cup of shredded coconut
- 1 cup of cashews
- 4 cups of water
- 2-3 dates (optional, for sweetness)
- Pinch of sea salt
Note: The measures provided above are for a larger batch of coconut cashew milk. Feel free to adjust the quantities according to your preferences.
Step-by-Step Instructions
Step 1: Soak the Cashews and Shredded Coconut
Start by soaking the cashews and shredded coconut in separate bowls. Fill each bowl with enough water to cover the ingredients and let them soak for at least 4 hours or overnight. Soaking the cashews and coconut helps to soften them, making them easier to blend and resulting in a smoother milk.
Step 2: Drain and Rinse the Cashews and Coconut
After soaking, drain and rinse both the cashews and shredded coconut thoroughly. This step helps to remove any residual dirt or impurities, ensuring a clean and fresh-tasting milk.
Step 3: Blend the Cashews and Shredded Coconut
Now it’s time to blend the soaked cashews and shredded coconut with fresh water. In a high-speed blender, combine the soaked cashews, shredded coconut, and 4 cups of water. If you prefer a thicker milk, you can reduce the amount of water slightly. Blend on high speed until the mixture becomes smooth and creamy.
Step 4: Strain the Mixture
To achieve a silky-smooth texture, strain the blended mixture using a nut milk bag or a fine-mesh sieve. Gently pour the mixture into the bag or sieve, allowing the liquid to separate from the pulp. Use a spoon or clean hands to press down on the pulp, extracting as much milk as possible. Set aside the pulp for other culinary uses, such as adding it to baked goods or granola.
Step 5: Optional: Sweeten and Flavor
If you prefer a slightly sweeter milk, you can add a few dates to the strained milk and blend again until well combined. Alternatively, you can sweeten the milk with a drizzle of maple syrup or honey, according to your taste preferences. Additionally, you can enhance the flavor of your coconut cashew milk by adding a dash of vanilla extract or a sprinkle of cinnamon.
Step 6: Store and Enjoy
Transfer the freshly made coconut cashew milk into a clean glass jar or bottle with a tight-fitting lid. Store it in the refrigerator and consume within 3-4 days for the best taste and freshness. Remember to shake well before each use as the milk may naturally separate over time.
Tips and Variations
- For an extra creamy milk, you can use full-fat coconut milk instead of shredded coconut. Simply replace the shredded coconut with 1 cup of full-fat coconut milk in the recipe.
- Get creative with flavors by adding a tablespoon of cacao powder for a chocolatey twist or a handful of berries for a fruity burst.
- If you prefer a thinner consistency, you can add more water to the mixture during the blending process.
- Don’t throw away the leftover pulp! You can dehydrate it and use it as a base for homemade granola or as a gluten-free flour substitute in baking recipes.
- You can substitute the cashew milk with almond milk