
Cross country skiing can be an easy and fun way to stay warm during winter, but it’s also tough! You might not know what equipment is best for beginners or how you should move your feet.
In this article, I’ll cover everything you need to know to get started with cross country skiing from choosing the right ski equipment to the basic techniques needed to get you pushing off your skis smoothly.
We hope that after reading our guide you will have a much greater understanding of what it takes for beginners like yourself who are looking into taking up a new winter sport!
The easiest way to learn how to cross country ski is by starting with the classic technique (where skis move in a straight line). This basically involves gliding your skis parallel inside of tracks. The more advanced skate-skiing style – similar to ice skating, uses V shapes on flat groomed trails and outside of the rails.
This beginner’s guide will focus on classic cross country skiing.
How to get into your cross country skis
Stepping into bindings can be tricky for novice cross country skiers. With the right technique, however, you will find that it is really simple and will work for any type of equipment.
Clean your cross country ski boots
Tapping your ski boots’ soles will help you step more easily into the binding.
Mud, snow or ice could get stuck to the outsole of you ski boots and that can make it difficult to step into the bedding of your skis; but just tapping them with you ski poles should do all we need!
Stepping into your cross country skis
The majority of cross country ski bindings have a leaver. Lift this lever up to open the binding.
Put your skis flat on the snow so that they don’t slide off down the hill. There is no right or left ski, so you don’t need to worry about that.
Line your toe up behind the rubber bumper and push down until it clicks and then lock the binding by pushing the lever back down. The metal bar on your boots’ outsole tip should fit easily into the binding.
What How to Step Into Your Cross-Country Ski Bindings – YouTube Video
How to hold cross country ski poles
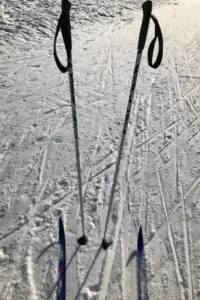
Cross country skiers who don’t use their poles properly often have a hard time maneuvering through trails. In order to control your skiing, you need the ability to utilize both upper body power from in combination with lower leg work. Finally it also provides better balance in the glide position and allows for a better workout without overexertion of the hand and arm muscles.
Make sure you always use the straps when holding your poles. There are three different types of straps for cross country ski poles:
- Loop straps: these are the standard classic cross country straps, similar to alpine skiing pole straps. Fine for most beginners
- Harness straps: These ones hold the pole closer to your hands. They are typically used by intermediate to advanced skiers
- Quick-release harness straps: these straps are like the harness straps, but have the added benefit of being able to disconnect from the pole while the strap itself remains on the skier’s hand. This makes them more practical for fast and easy removal.
For the purpose of this article, we will focus on the standard loop straps. To put these on, simply slide your hands through the bottom of the strap in an upwards manner and grip the pole. The middle of the strap should sit on your wrist. If it is higher or lower than your wrist, you will need to shorten or release the strap.
Watch How to Correctly Put On Your Ski Poles – YouTube Video.
Work on your balance
When you first start classic cross country skiing, start by doing a little shuffle to get the feeling of the skis on your feet. You can compare this to walking on skis.
To get the full benefits of XC skiing and move more efficiently, you will want progress from simply shuffling on the snow to kicking and gliding. For this, you will need to learn how to shift your weight from one ski to another. Working on your balance is key for this.
A good way to improve balancing from one ski to another, start by skiing without your poles. I would recommend spending 15 – 20 minutes of your ski day just kicking and gliding in a straight line of approximately 100 m back and forth without your poles.
Another way to improve your balance is your body posture. When starting out cross country skiing it will be tempting for your to look at your skis to make sure you are doing the right thing but this will shift your body weight too far forward and make you lose balance. Make sure that your ankles, hips, and knees are slightly bent and look forward.
Classic cross country skiing techniques
The variations in terrain and snow conditions will dictate your choice of technique. Change tempo and techniques to match the resistance that you feel under your skis.
The diagonal stride is a technique that’s useful for most single-track conditions.
In faster tracks, double poling can be an effective way to navigate the terrain as it gets more difficult and steep with increased resistance on your skis; but don’t forget about herringbone when climbing those hills!
Let’s go through each technique in more detail.
Diagonal striding
The diagonal stride is unique to the classic cross country ski technique and is all about kicking and gliding. If you want to improve your classic country ski performance you will need to work on your glide technique.
In diagonal striding, your arms will be doing the same movement pattern as with double polling, although, your arms will be moving independently and alternatively to the legs.
A good way to get started with this motion is to just do regular walking with your poles, this will give you the right sense of motion and coordination between your arms and your legs. Once you have got a hang of the timing, put your skis back on and try a little shuffle to practice your timing even further.
The key components of the diagonal stride are the kick, the weight shift, the glide and the recovery. Let’s look at each one in more detail.
The kick is achieved by transferring your body weight onto one leg. This will flex the waxed cambered part of the ski and make it grip the snow so that you can move your body forward from that position. At the same time of doing this, your opposite arm should be polling.
Using power from your hips, transfer your weight to the other leg and perform the same kick motion.
For the glide phase, try to make yourself as light as possible, so that the kick zone of the ski doesn’t make contact with the snow and use the momentum from the kick to glide for as long as possible.
Watch the Cross Country Ski Diagonal Stride Technique – YouTube Video
Double poling
Double poling is used for slight downhills or long flat distances. This technique is performed by pushing down on both poles at the same time and letting your skis glide.
Start by bending your knees and ankles forward with your hips over your feet. Your arms should be bent at 90 degrees and in front of you – at the level of your mouth.
Activate your core and plant your poles in the snow – your poles should be landing at the tips of your toes, if your poles are landing closer to the tips of your skis, then your arms are too straight. If your poles are landing by your heels, then you are not putting your arms out far enough.
Drive your elbows back (you can use your jacket pockets as a reference of where to push back to) and push off of your pole and glide forward.
Keep repeating this motion and move forward.
Watch the Cross Country Ski Double Poling Technique – YouTube Video
Kick double pole
The kick and double pole is often used as a transition technique between the double pole and the diagonal stride to preserve momentum when approaching the base of a hill.
Start with a double pole, then perform a kick with one leg at the end of the recovery phase as the poles are extended forward in preparation for the next double pole plant. The non-kicking leg remains at the back in a relaxed position. Bring both legs back together in preparation for the next double pole.
To put it simply, the kick double pole uses the same double pole motion with an alternate kick in between each double pole cycle.
Watch the Cross County Ski Kick Double Pole Technique – YouTube Video
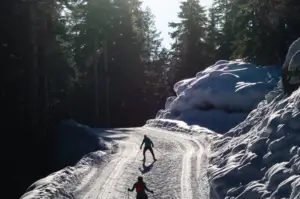
How to cross country ski uphill
Here are some quick and easy tips to help you learn how to cross country ski uphill.
Gradual and slight uphill
- Keep your skis in the track
- Shorten up your stride into the shuffle movement
- Use a shorter push but put more intensity into the pocket of the track with more of an ankle and knee flexion, this will flatten the camber of the ski and bring the grip kick zone of the ski into closer contact with the snow and prevent you from sliding backward.
Steeper hills – herringbone technique
- When the hill gets steep enough that the short diagonal stride is no longer effective and you find yourself sliding back down the hill, it’s time to switch to the herringbone technique
- To do the herringbone technique, you need to step out of the track,
- Move your skis into a V shape with the tip of your skis pointing outwards
- Roll your feet inwards so that the inside edge of your skis digs into the snow
- Keep the opposite arm to opposite leg movement
- Slowly step up the hill while using your poles to make sure you don’t slide backward.
Watch the Cross Country Ski Herringbone Technique – YouTube Video
If the hill gets very steep you could then consider to side step up the hill.
How to cross country ski downhill
There are multiple techniques that can help you when cross country skiing downhill.
- The first option that you can use on low-angle hills is to keep your skis in the track with your ankle and knees slightly bent, your hips over your feet, and your arms slightly apart from your waist.
- Keep your skis sliding in the track and gradually go down the hill
- If there is a corner in the hill, you can keep your skis in the track and just follow through just like a train ride its rails around the corner
- If you are picking up a bit too much speed that you are comfortable with, you can do a half wedge.
- This is done by shifting your weight to the ski that you are going to keep in the track, lift up your other ski and step it out of the track and push in on the inside of that ski, which will form a wedge shape.
- The more pressure you add to the ski in the wedge position, the slower you will go.
- Once you’ve reached a more comfortable pace, you can lift the ski back into the track and continue gliding on.
If the hill is quite steep and you would like to have more control, you can use the full wedge.
- This is done by fully stepping out of the tracks and putting both feet into a wedge shape.
- To do this push both heels out and point the tips of your skis together and push in on the inside of your feet.
- The wider you push your skis out into the wedge shape, the slower you will go, you can keep pushing wider and harder to come to a complete stop.
When going downhill remember to keep your hands in front of you and the tips of your poles behind you, this will help you to keep control and balance as you are going down the hill.
Watch How to Slow Down On Cross Country Skis – YouTube Video
What to do next
By following these simple steps on how to classic cross country ski, you will get gliding across the trails in no time, although some of the techniques like the kick double pole may take a little bit more practice to master.
When you are first starting out, I would also recommend to take a few lessons – professional ski instructors will often identify specific areas for each individual cross country skier to focus on.
The key to improvement is practice, but practicing should be meaningful. Take your time, work on your techniques, get out onto the trails as much as possible and most importantly enjoy yourself!
Check out our article on how to work on your xc ski fitness during the summer season.